azure sentinel setup
For whatever reason, most of the content and training I've consumed to gain better understanding into cyber security has been focused on open source technologies. Someone recently suggested I take a look at Microsoft Sentinel, I looked through some Microsoft Learn content and while the content is very good and informative, I much prefer to learn by doing so decided to implement a quick trial.
Most of the content and steps will be taken from content direct from Microsoft but my goal is, should the opportunity arise for a production implementation in the future, I'll have a jump on things.
I've been stung for a few 100 euro before, so my approach with cloud trials is to setup a new account for whatever I'm testing out. If it only takes a week to complete my testing thats fine, I fully close that account rather than leaving it run "just in case" (and probably forgetting about it).
- So first step is to go to Azure and setup a trial account using an email alias and adding card details. Working within a Firefox container should alleviate some of the inconvenience of having multiple Microsoft accounts.
- Next up, search for
Microsoft Sentineland add the feature, thenCreate a new workspaceif you don't have one already. This should create the required Log Analytics workspace. - Next up, select the workspace from the previous step and add Microsoft Sentinel. After a few min you should be presented with the Sentinel UI.

For this demo I'm initially going to setup two local VMs, a Windows server and a Ubuntu server. Once those are up and running, I'm ready to for the Sentinel config and to get the agent deployed to my VMs to start passing data in.
- First we need to register the three resource providers below. Just select your Azure subscription and select
Resource Providerfrom there register the following: -
Microsoft.HybridCompute
-
Microsoft.GuestConfiguration
-
Microsoft.HybridConnectivity

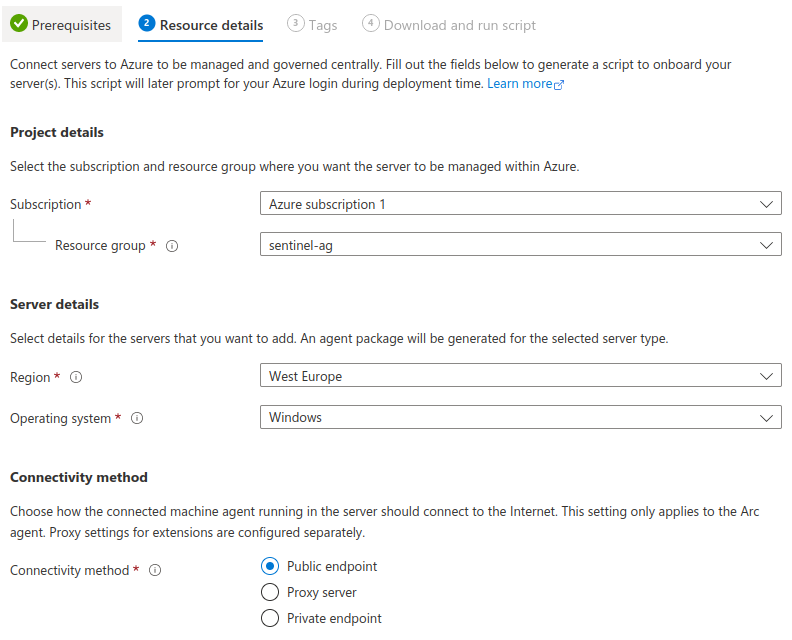
- Next we go to this Azure Arc link to generate the appropriate install script. For this instance I'm using the
Add a single serveroption. - Select the appropriate settings, defaults in my case and first up I'm generating the Windows script.
- Running the downloaded script in ISE provided the output below. Next up I repeated the process for my Linux VM (see additional notes at bottom).

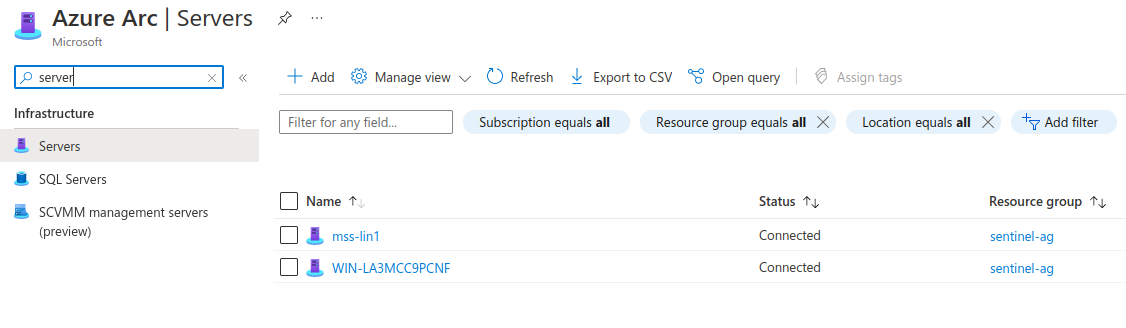
- After running the install scripts the two servers showed up in Azure Arc under servers. Next step is to get some logging sent from them.
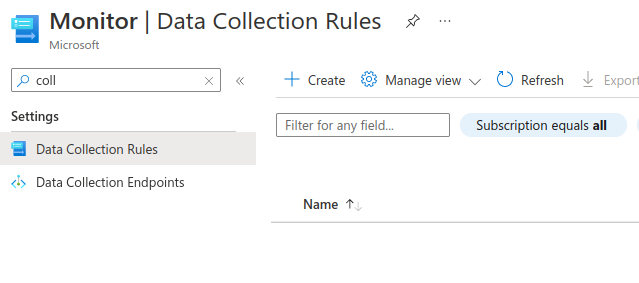
- First we need to create a data collection rule under the
Monitorservice.
- Using the
Customplatform type allow collection from both Windows and Linux devices. - Under Resources we add the two onprem machines
- Under Collect and Deliver I added both Windows and Linux log sources (Perf, Event and Syslog)
- Finally clicked review and create and waited for the setup to complete.

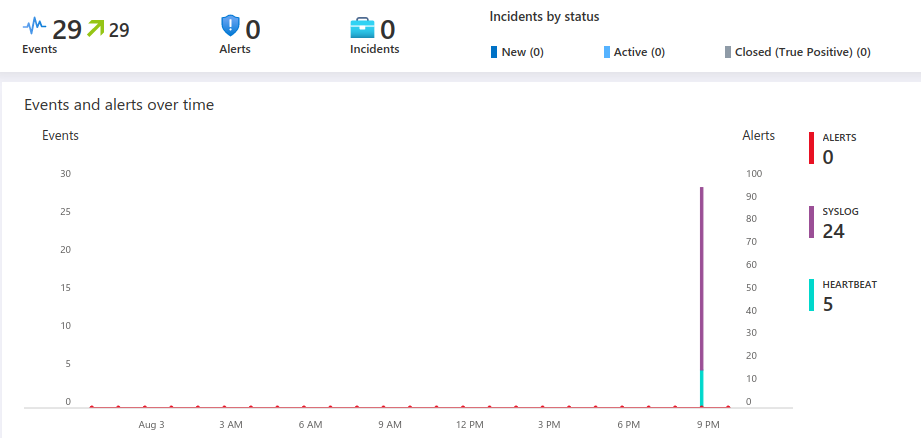
- After waiting a short while we can finally see some data showing up within the Sentinel dashboard.
-
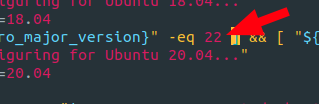
Notes on first run of the Linux install script I got a
error: unsupported Ubuntu version: 22:04error. While not recommended for production, I got around this by editing the two install scripts (after the initial failed run which downloadedinstall_linux_azcmagent.shfile) -
Comment out the download command for the second run

-
Change the release version check to 22